Article language: English
Your Shookio Booking Profile: From Customer Request to Approved Job
See how your Shookio booking profile works, with real screenshots of the shareable link, customer request form, and approve-or-decline window.
You are halfway through a job when another customer asks, “How do I get on your schedule?”
With Shookio, you can send them your business’s booking link. They can view your profile, describe the work, and request a date and time. You review the details before confirming the appointment.
Your business gets a public booking profile. Your customers get a simple way to request work. You stay in control of which jobs you accept.
The flow: Share your link → Customer sends a request → You review it → Approve and create a job, or decline.
The images below are actual screenshots from regular Shookio. Business and customer names, emails, phone numbers, addresses, worker names, and example request values have been replaced with sample details. The interface has not been redesigned. Screenshots are cropped where helpful. No live customer request was submitted or approved for this walkthrough.
1. Find and share your Shookio booking link
Open Bookings in your company workspace. The Public Booking Page panel contains the link you can share with customers, along with controls to copy it, open the page, and edit your booking profile.
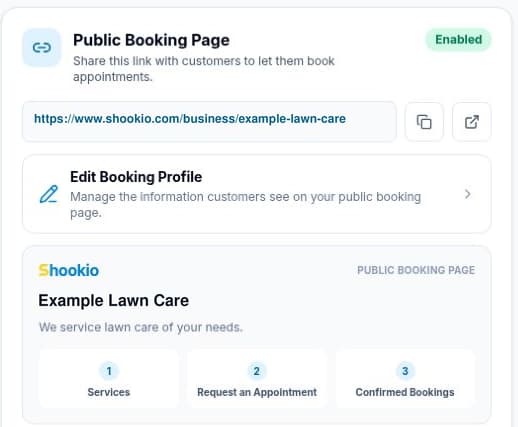
The Public Booking Page panel in the company workspace. The business name and link use sample values.
A business profile link can look like this:
https://www.shookio.com/business/example-lawn-care
This is an example address, not a live booking page. Copy your own link from Shookio instead of typing the example. The final part of the address identifies your business profile.
You can put your link in a customer text, your email signature, on your website, or in a social profile that allows website links. For example:
“Thanks for reaching out! Use our booking link to tell us what you need and request a time. We’ll review it and confirm with you.”
Use Edit Booking Profile to manage the information customers see. Open View Public Page to check the customer-facing page before sharing it.
2. Customers see a profile for your business
Your public profile gives people a place to learn about your business before requesting service. The example below shows the business name, cover photo, logo, location, description, services, contact number, and service area.
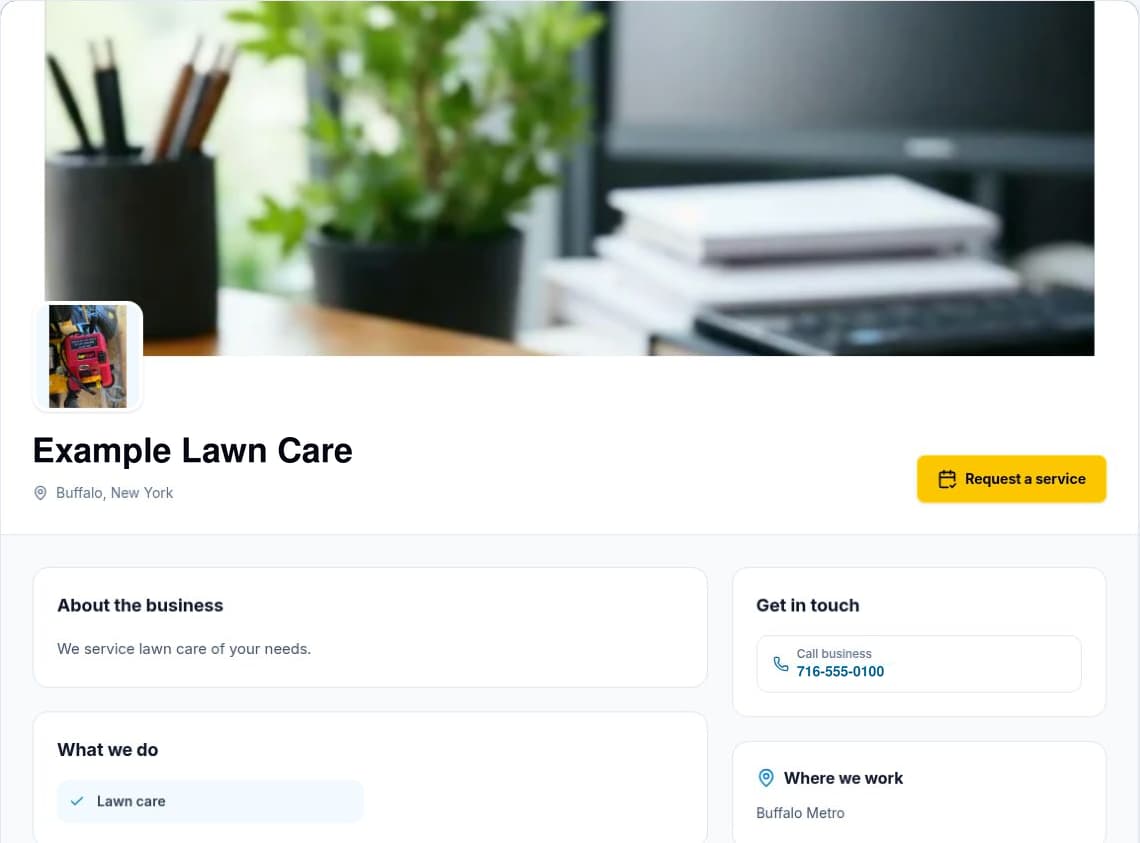
The customer-facing business profile, with sample identifying details. The yellow Request a service button opens the request form.
This gives you something useful to send when someone asks what you do or how to book. You can direct them to a page for your business, where the next step is clearly visible.
The profile and request form serve different purposes: the profile introduces your business, and the form collects the details you need to review a job.
3. The customer fills out a service request
The customer selects Request a service and reaches the public appointment request form.
They enter their name, phone number, service address, the service they need, and a description of the work. There is also an optional email field. Then they choose a preferred date and time.
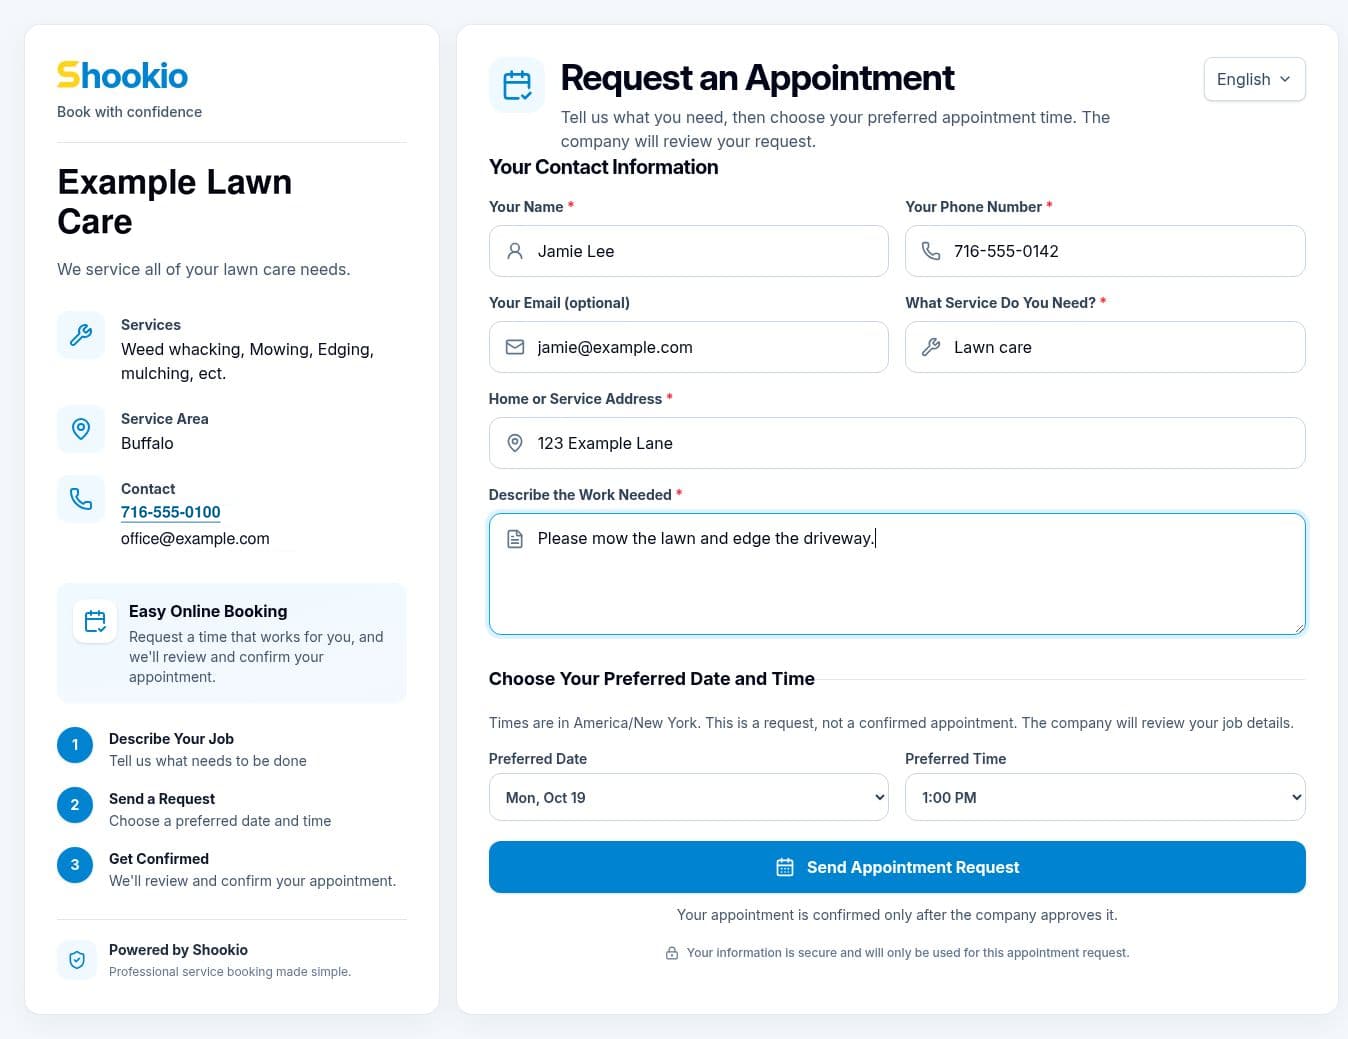
The real customer request form filled with fictional example details. This sample was not submitted.
In this example, Jamie asks for lawn care at 123 Example Lane and describes the work: “Please mow the lawn and edge the driveway.” The requested time is Monday, October 19, at 1:00 PM.
Getting these details together helps you review the request without piecing together separate messages for the name, address, and work needed.
Sending the form does not confirm an appointment. The page tells customers that the company must approve the request first. Requested times use the company time zone shown on the form.
4. Review the request, then approve or decline
Back in your company workspace, open Bookings, find the request, and open its details. A pending request includes a Review and edit request section.
You can review the customer and job information, adjust the appointment date and time, choose a lead, select helpers, set a duration, and edit the job description before deciding.
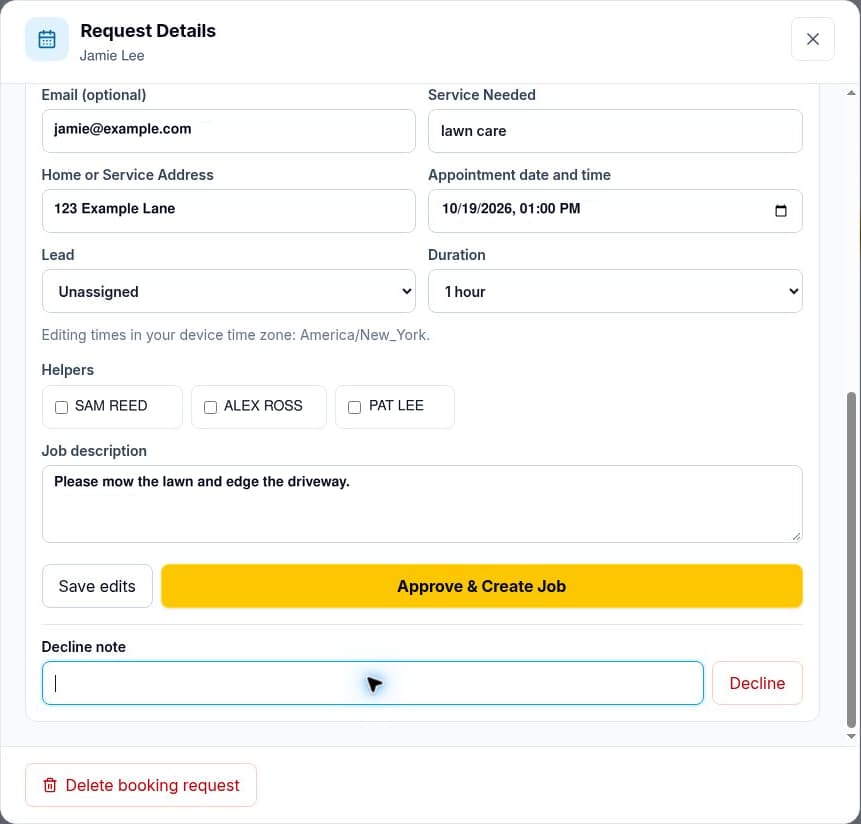
The actual Request Details window, scrolled to its review controls. Only sample values have been substituted. Approve & Create Job and Decline are real Shookio controls.
| Your choice | What it means |
|---|---|
| Save edits | Save changes to the request without choosing approval. |
| Approve & Create Job | Accept the request and create a job from it. |
| Decline | Turn down the request. A decline-note field is available in the same window. |
Before approving, check that the work is something you offer, the address is in your service area, and the timing fits your crew’s schedule. If the customer’s description is unclear, contact them using the details on the request.
You decide whether the request becomes a job. A customer asking for a time does not mean your crew has committed to it.
Why this is useful for a small service business
When you are working in the field, it can be hard to stop and collect every detail over the phone. A booking profile gives customers a clear place to start, while the request form brings the important information together for you to review.
It can help with three everyday tasks:
- Give interested customers a next step. Share one business link when someone asks about booking.
- Collect job details in one request. Review the service, address, work description, and preferred time together.
- Keep approval with the owner. Decide whether to accept the work before a job is created.
A booking link does not bring in customers by itself. Its job is to make it easier for people who already found your business to request your services.
A quick setup checklist
- Open Bookings in your company workspace.
- Check your details in Edit Booking Profile.
- Review your working hours and company time zone.
- Open View Public Page and check what customers will see.
- Use Copy Link and share your own booking profile.
- Review incoming requests before confirming the work.
See how booking connects to the rest of your work
Booking is the starting point. Once you approve the request and create the job, you can manage the work through Shookio’s job tools.
For more examples, read how to track work orders, lawn care scheduling for small crews, or our guide to gutter cleaning software for small businesses.
Want to see more of Shookio before setting up your company?